If you’re planning to buy or sell a home in Oregon, you’re probably juggling a lot of moving parts. One of the most critical and often overlooked steps is the home inspection checklist. According to Oregon real estate statistics, the state’s housing market still shows a healthy demand, so it’s more important than ever to enter a transaction with confidence.
Home inspections can feel a bit daunting, but they are also your key to avoiding surprises and protecting your investment. You’ll find that a thorough inspection helps clarify a property’s condition, highlights potential issues, and puts everyone at ease before finalizing the deal.
In this ultimate guide, you’ll discover exactly what to expect in a standard Oregon home inspection, how to navigate the process from both a buyer’s and seller’s perspective, and how to handle any bumps along the way.
Understand Oregon home inspections checklist
You’ve likely heard that Oregon has some unique real estate rules and regulations. But what does that mean for a home inspection? Simply put, an Oregon home inspection is a systematic evaluation of a property’s condition.
Why it matters
- Hidden issues: A small crack in the foundation may seem cosmetic but can signal a major structural problem.
- Negotiation leverage: If you’re the buyer, a thorough inspection report could help when negotiating price or repairs.
- Cost savings: Sellers who identify and fix issues ahead of time can request a higher listing price or avoid frantic repairs mid-sale.
Inspector qualifications
While Oregon inspectors don’t have unlimited oversight authority, there are licensure requirements. You can look up licensed professionals through the Oregon Construction Contractors Board (often abbreviated as CCB). This ensures the inspector has met the state’s education and training standards.
Typical inspection scope
An inspector generally examines:
- Structural integrity (foundation, walls, floors)
- Roof condition (shingles, gutters)
- Electrical systems (wiring, breakers)
- Plumbing (pipes, water pressure)
- HVAC (heating, ventilation, air conditioning)
- Interior elements (windows, doors, drywall)
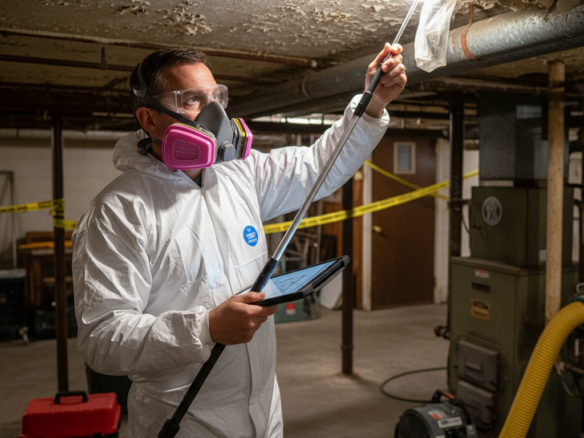
They may also note signs of pests or water damage, although specialized pest inspections sometimes require a separate appointment. Oregon’s weather can be rain-heavy, so inspectors often pay close attention to drainage and moisture-related issues. Keep in mind that not every inspector offers all extra services (like radon or mold testing). If you want these done, mention it when hiring.
Examine 2025 market context
Market conditions can subtly shape the home inspection process. In a slower market, buyers might ask for more repairs, or sellers might preemptively fix issues to stand out. In a hot market, an inspection report might be your only chance to request crucial repairs.
2025 Oregon trends
As you already know from Oregon real estate statistics, the state’s real estate market remains appealing to young professionals and middle-aged white-collar workers looking for a healthy but stable place to live. New constructions are popping up in many regions, but older homes in established neighborhoods still draw plenty of attention. If you’re operating in a fast-paced market, you might need to schedule an inspection quickly. Conversely, if you face a slower market, you can use the inspection findings to negotiate a stronger deal.
Potential effects on inspections
- Fast market: Less time to schedule, possible pressure to waive certain contingencies. Stay vigilant.
- Balanced market: Enough flexibility to negotiate repairs, but also enough competition to keep you on your toes.
- Slow market: As a buyer, you may have more bargaining power and can negotiate fixes. As a seller, you might want to make your property as flaw-free as possible before listing to avoid last-minute price cuts.
Prepare a buyer checklist
If you’re on the buying side, you’ll want a systematic approach for your inspection. This helps you spot red flags early and gives you an organized way to talk with the inspector.
1. Research the property’s background
- Ask for disclosures: Sellers in Oregon must provide certain disclosure forms about known issues.
- Look at online records: Property tax history, past renovations, or any liens might hint at underlying problems.
- Consider location: Proximity to wetlands, historic districts, or farmland can affect the utility layout and potential for future updates.
2. Schedule the inspection as early as possible
- Avoid scheduling it too close to the closing date. If major repairs are needed, you’ll want time to negotiate.
- Ask for an inspector’s availability well in advance, especially if you’re buying during peak seasons (spring and summer).
3. Attend the inspection
Many buyers skip this step, but physically being present:
- Lets you see the inspector’s process up close.
- Offers a chance to ask questions or point out areas of concern.
- Helps you learn about future maintenance needs.
4. Follow up on the report
The inspector’s findings might include:
- High-priority concerns: Structural damage or code violations.
- Medium concerns: Non-urgent repairs that could become major if ignored.
- Cosmetic issues: Leaky faucets, chipped paint, or squeaky doors.
This written report is not just a list of problems. It’s a roadmap for negotiating repairs or adjusting the contract price. Consult with your real estate agent about what’s reasonable to request based on local norms and the home’s overall condition.

How to Prepare Home Inspection Checklist
On the seller side, an inspection can help you avoid last-minute surprises. By handling repairs early, you can sweeten the deal and potentially command a higher price.
1. Conduct a pre-listing inspection
This is optional, but it can be a game-changer. Paying for a professional inspection before you list:
- Shows buyers you’re transparent about the home’s condition.
- Lets you make repairs in your own time, often at a more favorable cost.
- Shortens the buyer’s due diligence period, which can lead to a quicker closing.
2. Address red flags proactively
- Energy inefficiencies: Update old insulation or fix drafty windows.
- Water damage: Repair leaks in the roof, basement, or plumbing lines.
- Pest issues: If you notice rodents or termites, bring in a specialist to treat and repair the damage.
3. Prepare your home for the inspection
Little steps make a big difference:
- Unlock all doors to basements, attics, or sheds so the inspector can access every nook.
- Clear clutter from crawl spaces, utility rooms, and garages. This helps the inspector get a full view.
- Label the electrical panel and keep pilot lights lit so major systems can be tested.
4. Offer maintenance records
Buyers love transparency. Providing receipts for HVAC tune-ups, roofing work, or appliance repairs builds trust. It also serves as proof you’ve been a responsible homeowner, which reinforces your asking price.
Hire the right inspector
Choosing a qualified inspector is vital because the report will shape your negotiations. Here’s how to pick someone who knows Oregon’s quirks and stays up to date with relevant guidelines.
Qualifications and reputation
- License check: Verify they hold an active license with the Oregon CCB.
- Insurance: Confirm they have errors and omissions insurance plus general liability coverage.
- References: Ask for or read reviews from clients. If multiple reviews mention thoroughness and professionalism, that’s a good sign.
Interview questions
It’s okay to treat this like a mini job interview. Ask:
- “How long have you been inspecting homes in Oregon?” Experience matters.
- “Do you specialize in certain types of properties?” If you’re buying a historic Victorian or a newly built condo, that matters.
- “Will your report include photos?” Visual evidence makes it easier to understand issues.
- “Do you provide follow-up assistance?” Some inspectors offer to answer your questions even after delivering the report, which can be a lifeline if you’re new to the process.
Costs and scheduling
Prices can vary by region and home size. For a typical single-family home, expect a range that fits your budget. The cost of the inspection is usually worth it when you consider potential savings if you catch a big problem early. Schedule the inspection at a time convenient for you so you can attend in person. This is a great chance to see your future home’s details up close or fully understand what you’re selling.

Identify key inspection areas
Your home inspector will focus on several core areas, but it helps to understand these categories yourself. That way, you can talk through any issues with clarity. Let’s break down some common components and what inspectors typically look for.
| Area | What Inspectors Check | Common Red Flags |
|---|---|---|
| Foundation | Cracks, shifting, water intrusion | Uneven floors, sticking doors |
| Roof | Shingles, flashing, drainage, signs of leaks | Missing shingles, saturated insulation |
| Plumbing | Water pressure, visible leaks, pipe material | Corrosion, slow drains |
| Electrical | Outlets, panel capacity, breaker performance | Old wiring (like knob-and-tube), flickering lights |
| HVAC | Furnace condition, ductwork, AC efficiency | Uneven heating or cooling, high energy bills |
| Interior | Walls, ceilings, windows, floors | Cracks in drywall, mold spots, stuck windows |
Foundation and structure
In Oregon’s rainy climate, water seepage is a common culprit behind foundation issues. Keep an eye out for:
- Standing water near the foundation.
- Visible cracks in the basement walls.
- Large tree roots shifting the soil.
Roof and attic
Missing shingles or poor attic ventilation can lead to moisture buildup and mold. This is particularly problematic in the Pacific Northwest’s damp atmosphere. Here, proper attic insulation and good ventilation can dramatically prolong the life of the roof.
Electrical and plumbing
Inspectors will open panels and check your wiring to see if it meets local codes. They’ll run faucets, flush toilets, and peek under sinks for leaks. Outdated plumbing can be an expensive fix, so pay close attention if the inspector flags old pipes in older homes.
Analyze the final report
Once you have the inspector’s findings, you might feel a little overwhelmed. Suddenly, your beloved property or dream home has a list of issues. Keep calm. This is where you translate the report into an action plan.
Organize the findings
- High priority: Anything flagged as major safety or structural concerns. Address these immediately in negotiations or as pre-listing repairs.
- Medium priority: Items that might become severe if ignored, such as small leaks or aging roof shingles that have a few years left.
- Low priority: Cosmetic or routine maintenance tasks.
Negotiation approach
If you’re the buyer:
- Ask the seller for a repair credit or request they fix major problems before closing.
- Focus on areas that significantly impact safety or cost, such as electrical and plumbing.
If you’re the seller:
- Weigh the cost of making repairs yourself against reducing the home price.
- Consider the market context—if you have multiple offers, you might not need to compromise much. If offers are scarce, addressing problems is often worth it in the long run.
Follow-up inspections
If the inspector uncovers significant issues—like termite damage or mold—you might need specialized experts to give a second opinion or a repair quote. A specialized inspection can clarify the scope of the problem and confirm whether the original findings were accurate.

Calculate costs and timelines
Home inspections involve two slices of cost: the inspection fee itself and the potential repairs or upgrades that might follow. Timelines also vary, especially if you discover issues that need professional fixes.
Inspection fees
- Average range: Depends on your home size, but typically a few hundred dollars.
- Additional tests: You might pay extra for radon testing, sewer line checks, or mold screenings.
- Re-inspections: If you want an inspector to verify repairs, that could be an additional fee.
Repair costs
Let’s say the inspector flags a leaky roof. You might pay anywhere from a few hundred to several thousand dollars to remedy it, depending on whether it needs a patch job or a full replacement. It’s helpful to gather multiple quotes from reputable contractors in your area. If you’re the buyer, you and the seller may split costs or adjust the purchase price so repairs can happen after closing.
Timelines to expect
- Scheduling the inspection: Typically within a week or two, but in high season it might be longer.
- Getting the report: Often within 24-48 hours, though complex inspections may take a few days.
- Renegotiations: Add another week or so while you and the other party discuss repairs or credits.
- Closing adjustments: If repairs require time, your closing date might shift.
A smooth inspection process can tuck neatly into a 30-day closing schedule, but more complicated issues might push you into a 45-day or 60-day timeframe. Knowing these variables helps you plan your contract deadlines and moving logistics more effectively.
Finalize the process
You’ve gathered your reports, weighed your options, and hopefully reached an agreement that works for everyone. Now it’s time to tie up loose ends and move forward.
Address deal-breakers
If a major structural or safety hazard surfaces and a resolution isn’t reached, you do have the option to walk away (as a buyer) or to hold firm on your current price (as a seller). The final home inspection contingency gives you power to make that choice.
Confirm completed repairs
If the seller agreed to fix certain issues, ask for receipts or documentation. A final walk-through often done a day or two before closing lets you see if the agreed-upon work has been finished to your satisfaction.
Document everything
- Keep the inspection report, plus any contractor estimates or repair invoices, in one accessible folder.
- Store digital copies in case you need them for insurance claims later on.
- Sellers, you might leave a copy of your most recent inspection report for future reference if the buyer wants it.
Plan next steps
Once the inspection results are settled, you can move to the final closing steps. Coordinate with your lender to ensure all required documents align with the financing approval. Double-check any contingencies like final appraisal or property insurance and get ready for settlement day. If you’re a seller, prepare to hand over keys and sign off on the deed. If you’re a buyer, finalize your mortgage and get ready for move-in.
Remember, a home inspection is not an enemy; it’s your ally. It gives you a detailed snapshot of the property, whether you’re stepping into a new chapter as a buyer or seeking a smooth exit as a seller.
Recap and next steps
Navigating an Oregon home inspection might feel like a big deal, especially with the state’s evolving real estate climate. By taking the steps we’ve discussed exploring the market context, hiring the right inspector, and approaching the checklist meticulously you’ll be far better off in the long run.
- Brush up on the 2025 market details so you know what to expect in negotiations.
- If you’re buying, schedule the inspection as early as possible and attend in person.
- If you’re selling, consider a pre-listing inspection to get ahead of potential requests.
- Use the final inspection report as a negotiation tool, focusing on major fixes but not forgetting medium-level maintenance.
- Keep all documentation to streamline the closing process and minimize surprises later.
That’s it; you’re now equipped with the knowledge to manage your Oregon home inspection with confidence. Whether you’re handing over the keys or getting ready to move in, your thorough approach ensures peace of mind for everyone involved. Good luck with your next big step, and remember that an inspection is your friend in a property world filled with both charm and potential pitfalls. Have questions or tips of your own? Share them with your real estate circle and keep the conversation going.